clack water softener manual

This manual serves as a comprehensive guide for installing, operating, and maintaining Clack water softeners. It provides detailed instructions to ensure optimal performance and troubleshooting.
1.1 Overview of the Clack Water Softener System
The Clack Water Softener System is designed to remove hardness from water through ion exchange, using synthetic cation exchange resin. It operates in cycles, regenerating with sodium chloride to restore softening capacity. The system includes a control valve, resin tank, and salt container. It offers both upflow and downflow configurations, ensuring compatibility with various water conditions. The softener improves water quality, reduces scale buildup, and enhances appliance longevity. Its design ensures efficient operation, catering to different household and commercial needs with customizable settings.
1.2 Importance of Proper Installation and Maintenance
Proper installation and maintenance are crucial for the Clack Water Softener System to function efficiently. Correct setup ensures optimal water treatment, prevents issues like scale buildup, and extends system lifespan. Improper installation can lead to reduced performance, increased energy costs, and potential damage to components. Regular maintenance tasks, such as checking water pressure, temperature, and salt levels, are essential to uphold water quality and system reliability. Adhering to manufacturer guidelines ensures safety, warranty validity, and consistent softening performance over time.

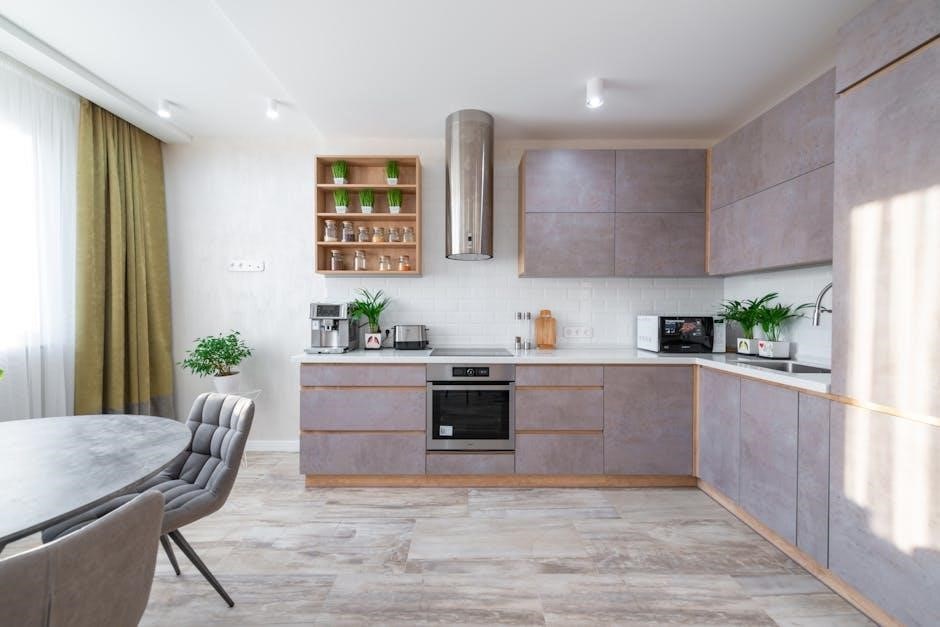
Understanding the Components of the Clack Water Softener
Understanding the Clack Water Softener’s components, including the control valve (WS1, WS1.25), resin, and drain/injector ports, is essential for efficient operation and maintenance.
2.1 Control Valve Specifications and Models (WS1, WS1.25)
The Clack WS1 and WS1.25 control valves are designed for water softeners, offering efficient flow rates and durability. WS1 handles standard flows, while WS1.25 supports higher capacity needs. Both models feature advanced programming options, including cycle adjustments and demand-initiated regeneration. They are compatible with various water treatment systems and are known for their reliability and ease of installation. These valves ensure optimal performance in residential and light commercial applications.
2.2 Resin and Media Used in the Softening Process
The Clack water softener utilizes high-quality synthetic cation exchange resin to remove hardness minerals from water. This resin is durable and designed for optimal ion exchange efficiency. It is used in both upflow and downflow systems, ensuring effective softening. The resin is regenerated with sodium chloride, restoring its capacity to remove calcium and magnesium ions. Regular maintenance ensures the resin remains effective, providing long-lasting soft water benefits for the entire household.
2.3 Drain and Injector Ports Configuration
The Clack water softener features drain and injector ports configured for efficient operation. The V3400BSPT-01 model includes BSPT threads on inlet and outlet ports, while drain and injector ports use NPT threads. The V3010-15Z Injector Plug and V3195-01 WS1 Refill Port Plug are essential for backwash-only valves, ensuring proper system function. These configurations ensure compatibility with various plumbing setups, allowing for seamless integration into existing water systems and maintaining optimal performance during regeneration and softening cycles.
Installation and Startup Instructions
This section outlines the step-by-step process for installing and starting up the Clack water softener, ensuring a smooth and proper setup for optimal performance.
3.1 Adding Water to the Salt Container
Manually fill the salt container with fresh water until there is approximately 1 inch of water above the platform located at the bottom. This step ensures proper brine creation for the softening process. The system will automatically draw water from this container during regeneration. Always use fresh water to maintain optimal performance and prevent contamination. Ensure the water level does not exceed the recommended height to avoid overflow or system malfunction.
3.2 Initial System Setup and Programming
Connect the interconnect cable to each control valve board for multiple units. Ensure all components are properly installed and configured. Begin programming by setting basic parameters such as water hardness and regeneration cycles. Refer to the manual for specific instructions on cycle setup and customization. Proper installation ensures optimal performance and warranty validity. Follow the guide carefully to complete the initial setup successfully.
3;3 Connecting the Interconnect Cable for Multiple Valves
To connect multiple valves, attach the interconnect cable to the three-pin connector labeled “INTERCONNECT” on each control valve board. This ensures synchronized operation between units. Proper connection is crucial for system coordination and functionality. Follow the manual’s wiring diagram to avoid errors. Once connected, the system will operate seamlessly, optimizing water treatment efficiency and performance. This step is essential for installations requiring multiple softeners to work together effectively.

Operating Instructions for the Clack Water Softener
Learn how to operate your Clack water softener effectively, including monitoring display indicators, manual regeneration, and understanding fill modes for optimal water treatment performance.
4.1 Normal Operation and Display Indicators (e.g., “Softening”)
During normal operation, the display shows “Softening” when the system is actively treating water. This indicator ensures the softener is functioning correctly, providing treated water. The control valve manages cycles seamlessly, and the display updates to reflect the current mode; Monitoring these indicators helps users verify system status and performance efficiently. Understanding these cues is essential for maintaining optimal water quality and system functionality.
4.2 Manual Regeneration Process and Benefits
Manual regeneration on the Clack water softener is initiated by pressing and holding the REGEN button for three seconds. This process immediately starts the system’s refresh cycle, ensuring optimal performance. Benefits include removing air pockets, bedding in resin, and flushing debris. Regular manual regeneration enhances efficiency, extends system lifespan, and maintains consistent water quality. It is particularly useful during initial setup or after extended periods of inactivity to ensure the softener operates at peak capacity and provides reliable results.
4.3 Understanding the Fill Mode and Volume Capacity
The fill mode on the Clack water softener is activated during the regeneration cycle, ensuring the system refills with treated water. Volume capacity refers to the amount of water the softener can process before regeneration. This is determined by settings during initial programming and can be adjusted based on water usage patterns. Understanding these modes helps optimize water treatment efficiency, ensuring consistent soft water supply while minimizing waste and maintaining system performance over time.

Maintenance and Troubleshooting
Regular maintenance ensures optimal performance, while troubleshooting addresses common issues like low water pressure or malfunctioning cycles, ensuring the system operates efficiently and effectively always.
5.1 Regular Maintenance Tasks for Optimal Performance
Regular maintenance is crucial for ensuring the Clack water softener operates efficiently. Check salt levels monthly, clean the control valve every 6 months, and inspect resin for degradation. Ensure drain lines are clear and free of blockages to prevent backflow issues. Replace worn-out seals or gaskets promptly to avoid leaks. Periodically regenerate the system manually to flush out trapped debris. These tasks help maintain water quality, prevent system downtime, and extend the lifespan of the softener.
5.2 Common Issues and Fault Finding (e.g., No Flow to Service)
Common issues with the Clack water softener include no water flow to service, which can result from low mains pressure or clogged filters. Check if the bypass valve is in the correct position. Ensure the control valve is functioning properly and verify salt levels. Inspect the resin tank for blockages and clean or replace components as needed. Refer to the fault finding section in the manual for detailed troubleshooting steps to resolve these issues efficiently and restore optimal performance.
5.3 Rectification Steps for Identified Problems
For issues like no flow to service, check the bypass valve position and ensure it’s fully open. Clean or replace clogged filters and inspect the venturi assembly for blockages. Verify salt levels in the brine tank and ensure proper water pressure. If problems persist, perform a manual regeneration to flush the system. Refer to the manual for specific repair guidance. Regular maintenance, such as cleaning the control valve and checking for worn parts, helps prevent future issues and ensures optimal performance. Always follow manufacturer instructions for repairs.

Programming and Customization Options
Customize your Clack water softener by adjusting cycles, volume capacity, and regeneration modes. Utilize demand-initiated regeneration and day override features for tailored operation, optimizing performance for specific needs.
6.1 Setting Up the Control Valve for Specific Needs
Configure the control valve to meet your water treatment requirements. Adjust cycles, volume capacity, and regeneration modes to optimize performance. Utilize demand-initiated regeneration for efficient operation or set a specific schedule. The control valve allows customization of flow rates and backwash cycles, ensuring tailored water softening. Proper setup ensures efficient water treatment and maintains optimal water quality. Refer to the manual for detailed instructions and manufacturer guidelines to customize your Clack water softener effectively.
6.2 Adjusting Cycles and Volume Capacity
Adjust the control valve cycles and volume capacity to suit your water treatment needs. The system allows customization of regeneration cycles, ensuring efficient water softening. Volume capacity can be set based on water usage patterns and hardness levels. Adjustments are made through the control panel, enabling precise control over the softening process. Proper tuning ensures optimal resin performance and minimizes salt usage. Refer to the manual for step-by-step guidance on cycle and volume adjustments to maximize system efficiency and water quality.
6.3 Day Override and Demand Initiated Regeneration
The Clack water softener features Day Override, allowing manual regeneration on specific days, and Demand Initiated Regeneration, which triggers based on water usage. This ensures efficient operation by regenerating only when necessary. The Day Override is ideal for consistent schedules, while Demand Initiated adapts to variable water demand, optimizing resin life and salt usage. These features work together to provide reliable softening and minimize maintenance, ensuring soft water availability without unnecessary cycles.

Technical Specifications and Requirements
The Clack water softener requires incoming water pressure between 2 and 8 bar (preferably 4 bar) and temperature between 3°C and 45°C for optimal performance.
7.1 Incoming Water Pressure and Temperature Guidelines
The Clack water softener requires incoming water pressure between 2 and 8 bar, with an ideal range of approximately 4 bar for optimal performance. The water temperature should be between 3°C and 45°C to ensure proper functionality. Exceeding these limits may lead to system inefficiency or damage. Ensure the incoming water quality aligns with the specified parameters for the media used in the softener. Proper pressure and temperature levels are crucial for maintaining efficient operation and extending the lifespan of the system.
7.2 Compatibility with Various Water Conditions
The Clack water softener is designed to handle various water conditions, including different hardness levels and impurities. It is compatible with standard mesh synthetic cation exchange media, regenerating effectively with sodium chloride. The system works efficiently across a range of water conditions, ensuring optimal softening performance. However, compatibility depends on the specific model and configuration, such as upflow or downflow systems. Always ensure incoming water quality aligns with the media specifications for the best results and system longevity.
7.3 Thread Types and Port Configurations (NPT, BSPT)
The Clack water softener systems feature various thread types and port configurations to ensure compatibility with different plumbing setups. Models like the V3400BSPT-01 utilize BSPT threads on inlet and outlet ports, while NPT threads are used for drain and injector ports. Proper alignment of thread types is crucial to avoid leaks and ensure secure connections. Always verify the thread specifications for your specific model to maintain system integrity and performance. Consult the manual or a professional for guidance on compatibility and installation.

Benefits of Using the Clack Water Softener
Clack water softeners reduce scale buildup, improve water quality, and enhance energy efficiency. They extend the lifespan of appliances and plumbing fixtures, ensuring softer water for drinking and bathing.
8.1 Reduction of Scale Buildup in Pipes and Appliances
The Clack water softener effectively minimizes scale buildup by removing calcium and magnesium ions, which cause hardness. This prevents mineral deposits in pipes, appliances, and plumbing fixtures, reducing maintenance and energy costs. Soft water extends the lifespan of water heaters, dishwashers, and faucets, ensuring optimal performance. By eliminating scaling, the system improves water flow and protects against corrosion, providing long-term benefits for both residential and commercial water systems.
8.2 Improved Water Quality for Drinking and Bathing
The Clack water softener enhances water quality by eliminating hardness, resulting in softer water for drinking and bathing. Soft water reduces skin irritation, makes cleaning easier, and improves the taste of drinking water. It also prevents soap scum buildup, ensuring cleaner clothes and dishes. By removing calcium and magnesium ions, the system delivers water that is gentler on skin and hair, making it ideal for daily use and improving overall hygiene and comfort in household applications.
8.3 Energy Efficiency and Extended Lifespan of Fixtures
The Clack water softener boosts energy efficiency by reducing scale buildup in water heaters and appliances, lowering energy consumption. Soft water prevents mineral deposits, extending the lifespan of pipes, fixtures, and appliances. This reduction in maintenance costs and replacements enhances overall system durability, ensuring long-term savings and performance. By minimizing wear and tear, the softener contributes to a more sustainable and cost-effective water treatment solution for households and businesses alike.

Safety Precautions and Warnings
Handle chemicals like sodium chloride with care, wearing protective gear. Ensure proper venting and drainage to prevent hazards. Always follow manufacturer guidelines for safe operation.
9.1 Handling Chemicals and Resin Media
When handling sodium chloride or resin, wear protective gloves and eyewear to avoid skin and eye irritation. Ensure the area is well-ventilated to prevent inhaling dust. Properly seal containers after use to maintain media effectiveness. Avoid ingesting any chemicals, and keep them out of reach of children. In case of accidental exposure, rinse thoroughly with water and seek medical advice if irritation persists. Always follow the manufacturer’s safety guidelines for handling these materials.
9.2 Ensuring Proper Venting and Drainage
Proper venting and drainage are crucial for the efficient operation of your Clack water softener. Ensure the drain line is correctly sized (minimum 1/2″ diameter) and securely connected to prevent leaks. The drain line should be routed to a suitable discharge point, avoiding any restrictions or backflow. Regularly inspect the venting system to ensure it is free from obstructions, as improper venting can lead to pressure issues. Always follow local plumbing codes and manufacturer guidelines for installation and maintenance.
9.3 Adhering to Manufacturer Guidelines
Adhering to Clack Corporation’s guidelines is essential for safe and efficient operation. Follow all instructions in the manual carefully, especially during installation, maintenance, and repairs. Use only original or recommended replacement parts to ensure system performance and warranty validity. Failure to comply with guidelines may lead to malfunction, void warranty, or pose safety risks. Always refer to the manual for specific procedures and contact Clack support for clarification if needed.
Water Quality and Softening Process
Soft water is defined as having less than 1 grain of hardness. The Clack system removes calcium and magnesium ions through resin, using sodium chloride for regeneration, improving water quality and reducing scale buildup effectively.
10.1 Definition of Soft Water and Hardness Levels
Soft water is typically defined as containing less than 1 grain of hardness per gallon (gpg), measured as calcium carbonate equivalent. Hardness levels above 1 gpg indicate the presence of minerals like calcium and magnesium. The Clack water softener system effectively reduces these minerals, ensuring water is classified as soft and suitable for household use, preventing scale buildup and enhancing water quality for drinking, bathing, and appliances.
10.2 How the Softening Process Removes Hardness
The Clack water softener uses an ion exchange process to remove hardness from water. Resin beads attract calcium and magnesium ions, replacing them with sodium or potassium ions. During regeneration, sodium chloride rinses the resin, restoring its capacity. This process effectively eliminates minerals causing scaling, resulting in soft water that prevents buildup in pipes and appliances, enhancing overall water quality and usability.
10.3 Role of Sodium Chloride in Regeneration
Sodium chloride plays a crucial role in the regeneration process of the Clack water softener. During regeneration, sodium chloride dissolves in water to form a brine solution. This brine flushes the resin beads, replacing trapped calcium and magnesium ions with sodium ions. The process restores the resin’s capacity to soften water, ensuring optimal performance. Sodium chloride is essential for maintaining the softening efficiency and longevity of the system, making it a vital component in the water softening cycle.

Comparing Clack Water Softener Models
Clack water softener models vary in flow rates, capacities, and features. The WS1 and WS1.25 are popular for residential use, while the WS2 offers advanced options. Upflow and downflow systems cater to different needs, ensuring tailored solutions for various water conditions and user preferences.
11.1 Differences Between WS1, WS1.25, and WS2 Series
The WS1 and WS1.25 series are designed for residential use, offering standard flow rates and capacities suitable for most households. The WS2 series provides advanced features, higher flow rates, and larger capacity options for demanding water needs. WS1 models are compact, while WS1.25 offers slightly higher flow rates. The WS2 series includes upflow and downflow configurations, catering to specific installation requirements. Each series ensures efficient water softening, with the WS2 being ideal for larger homes or commercial applications requiring superior performance and flexibility;
11.2 Choosing the Right Model for Your Needs
Selecting the appropriate Clack water softener model depends on factors such as water usage, household size, and specific water treatment requirements. The WS1 series is ideal for small to medium households with standard water needs, while the WS1.25 series suits slightly higher demand. For larger families or commercial settings, the WS2 series offers superior capacity and advanced features. Assessing peak water flow and hardness levels ensures the chosen model meets your needs efficiently, providing optimal water quality and system performance.
11.3 Upflow vs. Downflow Softener Systems
Clack water softeners offer both upflow and downflow systems, catering to different needs. Upflow systems regenerate with sodium chloride, ideal for higher water temperatures and pressures, while downflow systems use standard cation exchange media, suitable for typical residential use. Upflow systems require specific inlet water pressures and temperatures, often between 30-50 psi and 60°F or warmer. Downflow systems operate effectively under standard conditions, making them a versatile choice for most households. Understanding these differences helps in selecting the most suitable system for your specific water treatment requirements and operational preferences.
Resources and Support
Clack Corporation provides extensive resources, including downloadable manuals, contact information for assistance, and a network of authorized dealers for reliable support and service.
12.1 Accessing the Full Clack Water Softener Manual
The complete Clack Water Softener Manual is available on the Clack Corporation website or through authorized dealers. It is provided in PDF format for easy access and includes detailed instructions for installation, operation, maintenance, and troubleshooting. The manual covers all models, including WS1, WS1.25, and WS2 series, ensuring users can find specific guidance for their system. Additionally, it outlines technical specifications, safety precautions, and warranty information, serving as a comprehensive resource for optimal system performance and user understanding.
12.2 Contacting Clack Corporation for Assistance
For technical support or inquiries, contact Clack Corporation directly via phone at 608.846.3010 or visit their website. Their office is located at 4462 Duraform Lane, Windsor, WI 53598. Customers can access resources, manuals, and troubleshooting guides online. Clack also provides a dedicated customer service team to assist with installation, maintenance, and repair issues, ensuring prompt resolution and optimal system performance for all water softener models.
12.3 Finding Authorized Dealers and Service Providers
To locate authorized Clack water softener dealers and service providers, visit the official Clack Corporation website. Use the “Where to Buy” tool to find local distributors. Additionally, contact Clack’s customer service at 608.846.3010 for recommendations. Authorized dealers ensure genuine products and expert installation. You can also check local plumbing suppliers for Clack-certified professionals; This ensures reliable service and maintenance for your water softener system, adhering to manufacturer standards and warranties.
The Clack Water Softener Manual provides essential guidance for optimal system performance, ensuring clean water and extended appliance lifespan through proper installation, maintenance, and operation.
13.1 Summary of Key Features and Benefits
The Clack Water Softener Manual highlights a system designed for efficiency, durability, and improved water quality. Key features include advanced control valves, customizable settings, and robust resin media; Benefits such as reduced scale buildup, energy savings, and extended appliance lifespan make it a reliable solution for home and commercial use. Proper installation and maintenance ensure optimal performance, while troubleshooting guides help resolve common issues quickly. This comprehensive system enhances water quality, ensuring a better experience for drinking, bathing, and household chores.
13.2 Final Tips for Maximizing System Performance
To maximize your Clack Water Softener’s performance, ensure regular maintenance tasks are completed, such as checking salt levels and cleaning the brine tank. Monitor water hardness levels to confirm optimal softening. Follow manufacturer guidelines for installation and operation to prevent issues. Customizing settings like regeneration cycles can enhance efficiency. Additionally, refer to the manual for troubleshooting common problems and consider using genuine Clack replacement parts for longevity and compatibility.