craftsman 3000 psi pressure washer manual
This manual provides comprehensive information on the Craftsman 3000 PSI Pressure Washer, covering features, safety precautions, assembly, operation, maintenance, troubleshooting, accessories, warranty, customer support, parts list, and disposal.
Introduction
Welcome to the world of powerful cleaning with the Craftsman 3000 PSI Pressure Washer. This manual is your comprehensive guide to understanding, operating, and maintaining your pressure washer, ensuring years of efficient and reliable performance. Whether you’re tackling stubborn dirt on your driveway, cleaning grime from your deck, or preparing your car for a fresh coat of paint, this pressure washer is designed to make the task effortless and effective.
This manual provides detailed instructions for assembly, operation, and maintenance, as well as important safety precautions to keep you and your surroundings safe. You’ll find information on selecting the right nozzle tip for your cleaning task, troubleshooting common issues, and finding the right parts and accessories to enhance your pressure washing experience.
We encourage you to carefully read and understand this manual before using your Craftsman 3000 PSI Pressure Washer. By following the guidelines and recommendations provided, you can ensure optimal performance and longevity for your pressure washer, maximizing its cleaning power and extending its lifespan.
Features and Specifications
The Craftsman 3000 PSI Pressure Washer is a powerful and versatile cleaning tool designed to handle a wide range of tasks. Its impressive specifications and innovative features make it a standout choice for homeowners and professionals alike. Here’s a closer look at what makes this pressure washer a top performer⁚
- Powerful Engine⁚ Equipped with a reliable engine, this pressure washer delivers a maximum pressure output of 3000 PSI, providing ample power to tackle even the toughest dirt and grime.
- High Flow Rate⁚ The pressure washer boasts a flow rate of up to 2.7 gallons per minute, ensuring efficient cleaning and faster results.
- Durable Construction⁚ Built with quality materials and sturdy construction, this pressure washer is designed for long-lasting performance and reliability.
- Versatile Nozzles⁚ The pressure washer comes with multiple nozzle tips, allowing you to adjust the spray pattern and pressure to suit different cleaning tasks.
- Easy Maneuverability⁚ Large wheels and a lightweight design make this pressure washer easy to move around your property, even over rough terrain.
- Convenient Features⁚ The pressure washer includes a convenient detergent tank for adding cleaning solutions and a hose storage system for organized storage.
These features, combined with the pressure washer’s robust construction and user-friendly design, make it an ideal choice for a variety of cleaning needs around the home and beyond.
Safety Precautions
Operating a pressure washer requires a high level of awareness and adherence to safety precautions to prevent accidents and injuries. Always prioritize safety when using this equipment, and strictly follow these guidelines⁚
- Eye Protection⁚ Always wear safety goggles or a face shield to protect your eyes from flying debris or high-pressure water spray.
- Footwear⁚ Wear sturdy, closed-toe shoes to protect your feet from potential hazards.
- Protective Clothing⁚ Wear long pants and long-sleeved shirts to minimize exposure to high-pressure water and potential splashes.
- Gloves⁚ Use gloves to protect your hands from cold water and potential chemical exposure.
- Never Point the Spray Gun at People or Animals⁚ The high-pressure water stream can cause serious injury or even death.
- Avoid Using on Electrical Equipment or Wiring⁚ The pressure washer’s water stream can create a shock hazard if directed at electrical outlets, wiring, or appliances.
- Be Cautious on Slippery Surfaces⁚ The pressure washer can cause surfaces to become slippery, increasing the risk of falls. Be aware of your surroundings and maintain a secure footing.
- Inspect Equipment Regularly⁚ Before each use, inspect the pressure washer, hoses, and nozzles for any damage or wear. Replace any damaged parts immediately.
By strictly following these safety guidelines, you can minimize risks and enjoy a safe and productive cleaning experience with your Craftsman 3000 PSI Pressure Washer.
Assembly and Setup
Assembling and setting up your Craftsman 3000 PSI Pressure Washer is a straightforward process. Follow these steps to ensure a safe and efficient operation⁚
- Unpack and Inspect⁚ Carefully unpack the pressure washer and inspect all components for any damage or missing parts. Refer to the parts list in the manual for a complete inventory.
- Assemble the Handle and Wheels⁚ Attach the handle to the pressure washer frame using the provided hardware. Secure the wheels to the frame, ensuring they are properly aligned and rotate freely.
- Connect the High-Pressure Hose⁚ Connect one end of the high-pressure hose to the pump outlet on the pressure washer and the other end to the spray gun. Ensure the connections are tight and secure.
- Attach the Water Inlet Hose⁚ Connect one end of the water inlet hose to the water source (garden hose) and the other end to the water inlet on the pressure washer. Make sure the connections are secure.
- Position the Pressure Washer⁚ Place the pressure washer on a level surface near a water source. Ensure the area is well-ventilated and free from obstacles.
- Fill the Detergent Tank (If Applicable)⁚ If your pressure washer has a detergent tank, fill it with the appropriate cleaning solution according to the manufacturer’s instructions.
- Test the Connections⁚ Before starting the pressure washer, turn on the water source and check for leaks at all connections.
By following these simple steps, you will have your Craftsman 3000 PSI Pressure Washer ready for operation. Refer to the manual for detailed instructions and illustrations for each assembly step.
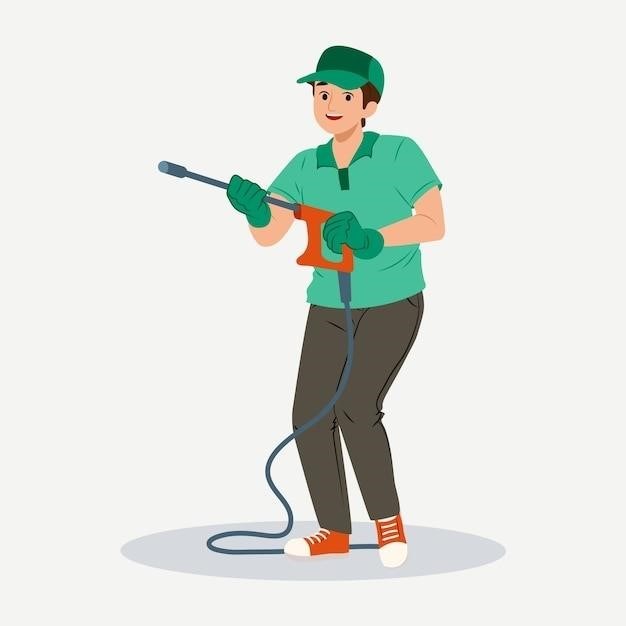
Operation
Operating your Craftsman 3000 PSI Pressure Washer safely and efficiently is crucial. Follow these steps to ensure a smooth cleaning experience⁚
- Start the Engine⁚ Ensure the pressure washer is on a level surface and the water source is turned on. Follow the engine manufacturer’s instructions to start the engine. Allow the engine to run for a few minutes to warm up.
- Adjust the Pressure⁚ Some models have a pressure adjustment knob. Consult your user manual for specific instructions on adjusting the pressure to suit the cleaning task. Lower pressure is generally recommended for delicate surfaces, while higher pressure is suitable for stubborn dirt and grime.
- Select the Appropriate Spray Tip⁚ Your pressure washer comes with multiple spray tips, each designed for different cleaning tasks. Choose the tip that best suits the surface you are cleaning. Refer to the manual for specific recommendations.
- Start Cleaning⁚ Hold the spray gun firmly and begin cleaning the desired surface. Maintain a consistent distance from the surface and move the spray gun in a sweeping motion. Avoid pointing the spray gun at people, animals, or delicate objects.
- Use Detergent (If Applicable)⁚ If your pressure washer has a detergent tank, add the appropriate cleaning solution according to the manufacturer’s instructions. Apply the detergent to the surface before cleaning.
- Rinse Thoroughly⁚ Once you have finished cleaning, rinse the surface thoroughly with clean water to remove any detergent residue or dirt.
- Shut Down⁚ Turn off the water source and allow the engine to idle for a few minutes to cool down. Then, switch off the engine.
Remember to always wear appropriate safety gear and consult your user manual for detailed instructions on operating your Craftsman 3000 PSI Pressure Washer safely and effectively.
Maintenance
Regular maintenance is essential for ensuring the longevity and optimal performance of your Craftsman 3000 PSI Pressure Washer. Follow these steps to keep your pressure washer in top condition⁚
- Clean the Pressure Washer⁚ After each use, clean the pressure washer thoroughly to remove dirt, debris, and detergent residue. Use a garden hose to rinse the exterior and the interior of the detergent tank. Wipe down all surfaces with a clean cloth.
- Check the Oil Level⁚ Regularly check the oil level in the engine and top it off as needed. Use the type of oil specified in your user manual.
- Inspect the Spray Tips⁚ Regularly inspect the spray tips for wear and tear. Replace any damaged or worn-out tips.
- Check the High-Pressure Hose⁚ Examine the high-pressure hose for cracks, leaks, or damage. Replace the hose if necessary.
- Inspect the Pump⁚ Check the pump for leaks and ensure all connections are tight. If you notice any leaks, consult your user manual or a qualified technician for repair.
- Clean the Spark Plug⁚ Regularly clean or replace the spark plug according to the manufacturer’s recommendations. A dirty spark plug can hinder engine performance.
- Store Properly⁚ When not in use, store your pressure washer in a dry, protected area. Cover the pressure washer with a protective tarp or cover to prevent dust and moisture buildup.
By following these maintenance guidelines, you can ensure your Craftsman 3000 PSI Pressure Washer remains in excellent condition for years to come.
Troubleshooting
If you encounter any issues with your Craftsman 3000 PSI Pressure Washer, refer to the following troubleshooting tips⁚
- No Water Pressure⁚
- Check the water supply⁚ Ensure the water source is turned on and providing adequate pressure.
- Inspect the inlet hose⁚ Make sure the inlet hose is connected securely to the water source and the pressure washer.
- Check the filter⁚ Clean or replace the inlet filter if it is clogged;
- Verify the pump⁚ Ensure the pump is running and not damaged.
- Weak Water Pressure⁚
- Check the spray tip⁚ Ensure the correct spray tip is installed and not clogged.
- Inspect the high-pressure hose⁚ Verify the high-pressure hose is not kinked or damaged.
- Check the pump⁚ Ensure the pump is working properly and not leaking.
- Engine Won’t Start⁚
- Check the fuel⁚ Ensure the fuel tank is full and the fuel is fresh.
- Inspect the spark plug⁚ Clean or replace the spark plug if it is fouled.
- Verify the air filter⁚ Clean or replace the air filter if it is clogged.
- Check the battery (if applicable)⁚ Ensure the battery is charged and connected properly.
- Engine Overheats⁚
- Check the oil level⁚ Ensure the oil level is sufficient.
- Inspect the air filter⁚ Ensure the air filter is clean and not clogged.
- Verify the cooling system⁚ Ensure the cooling fins are clean and not obstructed.
If these troubleshooting steps do not resolve the issue, consult your user manual or contact Craftsman customer support for further assistance.
Accessories
Enhance your Craftsman 3000 PSI Pressure Washer’s capabilities and cleaning efficiency with a range of optional accessories designed to tackle specific tasks and surfaces. These accessories can be purchased separately and are compatible with your pressure washer model. Here are some commonly available accessories⁚
- Spray Tips⁚ Different spray tips offer varying pressure and spray patterns, enabling you to customize the cleaning process for various surfaces. Common spray tips include⁚
- 0-degree⁚ Provides a concentrated, powerful stream for heavy-duty cleaning like removing stubborn grime and paint.
- 15-degree⁚ Offers a focused, high-pressure stream for general cleaning tasks like washing cars, decks, and driveways.
- 25-degree⁚ Delivers a wider, less intense spray pattern suitable for delicate surfaces like siding or windows.
- 40-degree⁚ Produces a gentle, fan-shaped spray ideal for rinsing and light cleaning.
- Soap Nozzle⁚ Allows you to apply cleaning solutions and detergents for enhanced cleaning power.
- Extension Wand⁚ Extends the reach of your pressure washer, allowing you to access hard-to-reach areas or clean taller surfaces.
- Surface Cleaner⁚ Designed for cleaning large areas like patios, driveways, and sidewalks, providing a consistent, even cleaning pattern.
- Detergent Tank⁚ Allows you to mix and dispense cleaning solutions directly from the pressure washer.
- Pressure Washer Gun⁚ Provides a comfortable grip and trigger control for easy operation.
- High-Pressure Hose⁚ Connects the pressure washer to the spray gun, allowing for flexible cleaning.
- Wheel Kit⁚ Adds wheels to your pressure washer for easy portability and maneuverability.
- Storage Bag⁚ Provides a convenient way to store and transport your pressure washer and accessories.
Consult your user manual or contact Craftsman customer support for a comprehensive list of compatible accessories for your specific model.
Warranty
Craftsman offers a limited warranty on its 3000 PSI Pressure Washer, providing peace of mind and ensuring your investment is protected against defects in materials and workmanship. The specific terms and conditions of the warranty may vary depending on the model and where you purchased it. It’s essential to carefully review the warranty information provided with your pressure washer or available on the Craftsman website.
Typically, the warranty covers repairs or replacements for defective parts for a specific period, often one year from the date of purchase. However, certain components, such as wear-and-tear items like hoses, nozzles, and filters, might have shorter warranty periods. The warranty may not cover damage caused by misuse, neglect, accidents, or unauthorized repairs.
To make a warranty claim, you’ll usually need to provide proof of purchase, such as a receipt or sales invoice. You may also need to return the defective component to the retailer or a designated service center. It’s recommended to keep your warranty information readily accessible and contact Craftsman customer support for further assistance with warranty claims or any questions regarding warranty coverage.
Customer Support
Craftsman is dedicated to providing excellent customer support to its customers. If you encounter any issues with your 3000 PSI Pressure Washer, have questions about its operation, or need assistance with warranty claims, Craftsman has various resources available to help you.
You can reach out to Craftsman’s customer support team by phone, email, or online chat. The contact information is typically provided in the user manual or on the Craftsman website. They have a team of knowledgeable representatives ready to assist you with any inquiries, troubleshoot problems, or provide guidance on using your pressure washer effectively.
Additionally, Craftsman often has an online FAQ section on their website that addresses common questions and concerns. You may find answers to your questions there without needing to contact customer support directly. Craftsman strives to provide prompt and helpful support to ensure a positive customer experience and address any concerns you may have about your pressure washer.